Clay or Papier-Mache for a Small Sculpted Form?
Clay or papier-mache for a small sculpted form? Compare shaping, drying, and finishing so you can choose a material that suits the making you enjoy.
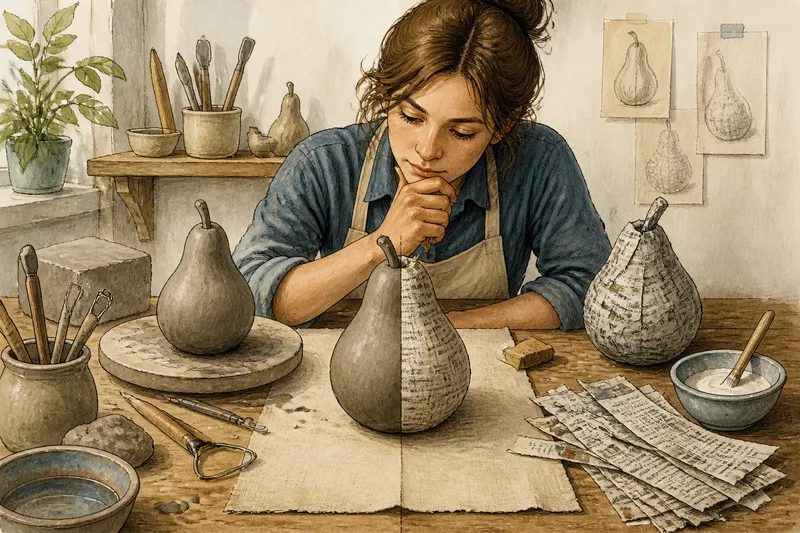
The common mistake when choosing clay or papier-mache for a small sculpted form is to treat both as interchangeable ways to build a shape. That choice can cost a beginner the pleasure of the work: clay rewards direct pressure and revision, while papier-mache asks for a supporting structure, patient layering, and attention to how paper settles.
For a small decorative object, the better material is less about which one is “easier” and more about which sequence of actions sounds satisfying. If you want to pinch, carve, and smooth a form while it is still soft, clay is the more direct route. If you like tearing paper, arranging strips, and watching a shell grow around a core, papier-mache gives you more of that process.
Choose the making rhythm
Clay keeps the sculptor close to the surface. A thumb can flatten a ridge, a wooden modeling tool can cut a crease, and a damp sponge can soften a transition. This makes clay appealing when the pleasure lies in adjusting the silhouette moment by moment.
Papier-mache separates building from finishing. First comes the armature or core, then the paper layers, then drying, filling, sanding, and painting. Each phase changes what can be done: once the paper shell dries, a major alteration may mean cutting or rebuilding rather than simply pressing the material into a new shape.
Think about how you want to spend the session, not just what you hope to display. Choose clay for responsive shaping; choose papier-mache for layered construction and a finish that can be painted.
Clay that cracks or slumps
A beginner may see a fine crack appear while shaping, or watch a narrow neck sag under the weight of a rounded top. These problems usually come from uneven thickness, excess water, or a form whose unsupported parts are too heavy for the clay body.
First, pause before adding water. Too much moisture can make the surface temporarily easier to move while weakening the form beneath it. Smooth a small crack with a barely damp finger or tool, and blend the surrounding clay rather than flooding the whole area.
Next, check the shape from more than one side. If a projecting ear, handle, or stem is pulling downward, support it temporarily with a soft pad or reshape it as a broader, shorter connection. A small sculpted form can often be made more stable by thickening a join and easing a sharp change in direction.
Finally, keep the wall reasonably even if the piece is hollow. A solid lump may dry differently from a thin shell, and a thick mass can hold moisture longer. For a decorative object, consider a compact silhouette with sturdy joins rather than delicate parts that demand constant correction.
When a clay form starts to sag, reduce the weight and strengthen the join before trying to refine its details.
Paper layers that lift
With papier-mache, the trouble often appears at an edge or seam: a strip curls away, a corner remains loose, or a patch rises after drying. This usually means the paper did not lie flat, the paste was unevenly distributed, or the next layer was added before the previous one had settled.
Begin by pressing the strip down from its center toward its edges. Overlapping strips should follow the contour rather than bridge across a hollow like a tent. Tear paper into manageable pieces; torn edges tend to blend into neighboring layers more readily than stiff, straight cuts.
If a section has already dried loose, do not bury the lifted edge under more wet paper. Ease it down if it remains flexible, or trim only the loose part and cover the repair with a smaller patch. Let the patch dry before continuing, so the repair does not trap a soft pocket beneath fresh layers.
Also consider the core. A balloon, crumpled paper, or a simple wire-and-card structure can serve as an armature, but the outside must offer a shape the strips can follow. Deep recesses and sharp projections are harder to cover cleanly than broad, gradual contours.
Use small strips around curves and save broad pieces for broad, open surfaces.
When the form feels wrong
A sculpture can be technically intact and still feel awkward. In clay, this often happens when details are added before the main masses read clearly. In papier-mache, it can happen when the armature dictates a stiff silhouette that the paper layers merely conceal.
Step back and look at the outline against a plain background. Turn the object slowly, checking whether its front, sides, and back belong to the same idea. If a decorative bird has a large body and a tiny head, for instance, decide whether that imbalance is expressive or simply accidental before adding eyes and feathers.
For clay, remove or press back details that compete with the main shape while the material is workable. For papier-mache, adjust the core before covering it; once the shell is layered, changes to the silhouette are more laborious. A useful approach is to make a small, plain version first, then add surface marks only after the overall contour feels intentional.
Imagine you want to make a small pear-shaped ornament. If you choose clay, begin with a single rounded mass, pinch a gentle shoulder, and narrow the top while the form remains soft; the observable result should be a continuous surface that can still be reshaped. If you choose papier-mache, crumple paper into a pear silhouette and secure it as a core, then apply overlapping strips; the result should be a light shell whose contour comes from the armature rather than from pinching wet material.
Drying and finishing problems
Finishing can expose weaknesses that were easy to miss during shaping. Clay may develop surface cracks or remain vulnerable if it is not fully dry before its intended finish. Papier-mache may feel soft in a thick area, or paint may emphasize ridges and seams instead of concealing them.
For clay, let the piece dry gradually and evenly, away from abrupt heat or drafts. If you plan to fire it, use a clay body suitable for that process and follow the clay supplier’s and kiln operator’s directions; air-dry clay is a different material and should not be treated as kiln clay unless its instructions explicitly allow it.
For papier-mache, check that the shell is dry through its thicker joins before priming or painting. A light sanding can soften rough transitions, but it will not correct a loose layer or a lumpy armature. Repair the structure first, then use an appropriate primer or gesso to prepare a more even surface.
In either medium, test a finish on an inconspicuous area or a separate scrap. Paint, sealers, and surface treatments can behave differently on porous clay, paper, and paste, so the product label and material instructions should guide the choice.
Which material suits you?
These questions help connect a material to the kind of work you want to do, rather than to a vague idea of beginner-friendliness.
Can I keep reshaping the form?
Clay is the more direct choice if you want to press, scrape, and refine the same surface as you go. Papier-mache is better if you enjoy committing to a core and building outward in layers.
Which material is better for a light ornament?
Papier-mache often suits a hollow, lightweight object because its shell can be built around an armature. Clay can also make a small ornament, but the shape and clay body should suit the intended handling and finish.
Can papier-mache hold fine details?
It can carry raised or cut details, but tiny, crisp features may be harder to form consistently in paper layers than in workable clay. Broad ridges, shallow grooves, and painted marks usually fit the material’s layered character.
What should I choose for an expressive surface?
Choose clay if fingerprints, tool marks, and carved lines are part of the intended appearance. Choose papier-mache if you want a surface that can be smoothed, primed, and painted, while accepting that seams may need careful preparation.
Match the material to the pleasure
A useful final question is what you want to notice while making: the pressure of a thumb changing a curve, or the rhythm of paper strips gradually covering a form. Clay makes revision immediate but asks you to manage softness, weight, and drying. Papier-mache makes construction visible in stages but asks you to plan the core and wait between layers.
For a first small decorative form, keep the design simple enough that the material’s character can be seen. A rounded vessel, abstract pebble, or uncomplicated animal silhouette gives you room to learn without letting fragile projections dominate the work.
Choose clay or papier-mache for a small sculpted form by the actions you want to repeat, not by the finish you imagine at the end. The most useful practice is to make one modest object, notice which parts of the process invite attention, and let that experience guide the next material choice.